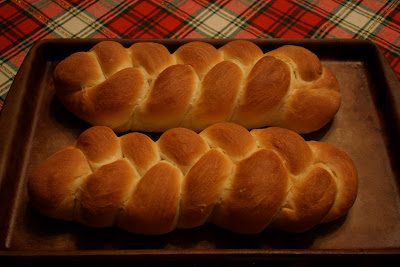
Basic White Bread - Braided Loaf
 One of my favorite ways to make a basic loaf of white bread "company" ready is to braid it. It is very simple and easy to do, and makes for a wonderful presentation. You can use this braided technique with your favorite bread recipe, or you can use this King Arthur Flour recipe for Basic White Bread. I make homemade bread often and have learned a couple things over the last year that have been helpful: 1) Make sure your water is the correct tempture (between 110 - 115)before you combine with your yeast (I use a digital meat thermometer). If it is too hot, it will kill the yeast. If it is too cold, it will take a long time to activate the yeast. 2) Give your dough plently of time to rise. I often find that it takes my dough longer than the suggested times to double in bulk. Probably because our house is cool. Obviously this changes depending on the season. The recipe listed below yields two loaves. I usually make one for us and one for a friend, or freeze for later.
Basic White Bread
from King Arthur Flour
2 cups warm water
2 tablespoons sugar or honey
1 scant tablespoon or packet active dry yeast
1/2 cup dry milk (optional)
2 tablespoons butter, softened, or vegetable oil
6 cups King Arthur Unbleached All-Purpose Flour
2 teaspoons salt
Pour the warm water into a mixing bowl. Add and let dissolve the sugar or honey and then the yeast. When the yeast is bubbling, add the dry milk, butter and 3 cups of flour and the salt. Mix together and then stir in a further 2 1/2 cups of flour. Sprinkle the remaining 1/2 cup on the surface you intend to use for kneading.
Knead the dough for 3 to 4 minutes, until it begins to behave as if it belonged together. Let it rest while you clean and grease the bowl. Continue kneading a further 3 to 4 minutes, until the dough feels smooth and springy.
Let the dough rise until doubled (1 to 2 hours). Knock it down, knead out any stray bubbles, cut it in half and form two loaves. Place them in two lightly greased 4 1/2 x 8 1/2-inch bread pans. (OR make two braided loaves, follow directions below).
 Divide your dough in half for your two loaves; make three long (about 20 inches) ropes with each half.
 If your ropes come out a bit uneven like mine, place your shortest OR longest one in the middle. Squeeze the ends together to bind and start braiding.
 After you have finished braiding the entire loaf, pinch the ends together and tuck the seam on the underside of the loaf.
 Place on a greased baking sheet. I like to use a stoneware pan but a regular baking sheet is fine too. Let rise until almost doubled (45 minutes to 1 hour).
Preheat the oven for 15 minutes to 350°F. Bake the loaves 35 to 40 minutes, or until nicely browned.  Remove bread from oven and cool completely on a wire rack.
For better directions on braiding dough (and some other great yeast dough tips) check out KAF's link here.
Enjoy!
 Remove bread from oven and cool completely on a wire rack.
For better directions on braiding dough (and some other great yeast dough tips) check out KAF's link here.
The awesome pictures for this post are compliments of my food photographer, Travis.
Enjoy!


Awesome job Andrea! I really like the way these photos came together, I think they perfectly illustrate what you are writing about. We obviously make a genius team. ;-)
ReplyDelete